
Imagine the aroma of freshly baked bread filling your home—golden crust, tender crumb, and the subtle sweetness of honey dancing with rich egg flavor. This is challah, the iconic braided bread that has been the centerpiece of Jewish Shabbat and holiday tables for centuries. More than just bread, challah represents tradition, community, and the joy of sharing food with loved ones.
What makes this challah recipe special is its perfect balance of authenticity and approachability. We use traditional techniques passed down through generations while providing clear, modern instructions that ensure success every time. The result is a challah with a deep golden crust, a light and tender crumb, and the characteristic braided beauty that makes it perfect for special occasions and everyday enjoyment alike.
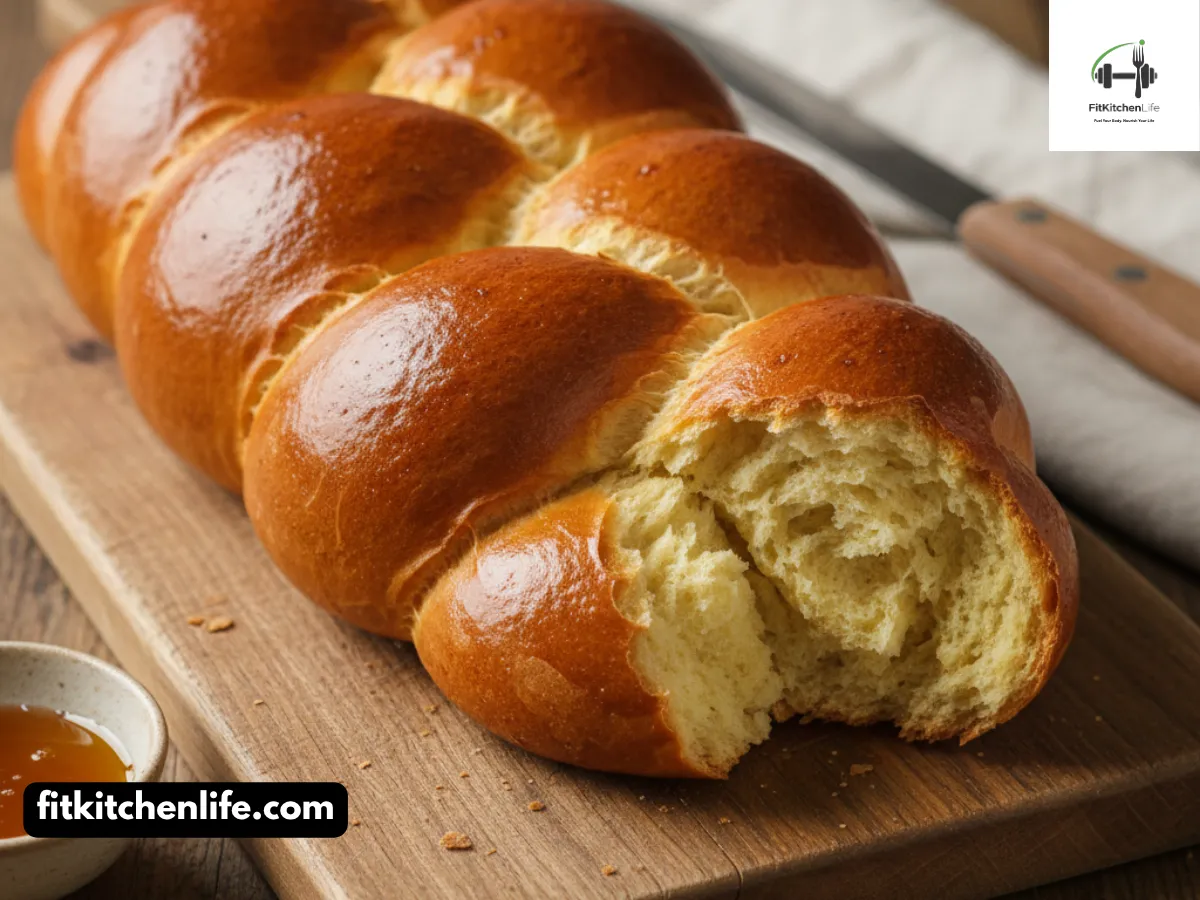
Picture breaking bread with family and friends, the soft strands pulling apart to reveal the pillowy interior. This isn’t just bread—it’s a connection to thousands of years of Jewish tradition, a symbol of peace and unity, and a delicious addition to any meal. Whether you’re preparing for Shabbat, Rosh Hashanah, or simply want to elevate your bread game, this recipe will guide you through each step with professional techniques and cultural insights.
Table of Contents
ToggleIngredients
For the Challah Dough
- 500g strong white bread flour (approximately 4 cups), plus extra for dusting
- 7g (2¼ teaspoons) instant yeast or active dry yeast
- 70g (¼ cup) caster sugar
- 2 teaspoons (12g) fine sea salt
- 2 large eggs, at room temperature, plus 1 egg yolk (reserve the white for topping)
- 70ml (¼ cup + 2 tablespoons) vegetable oil or sunflower oil, plus extra for the bowl
- 200-250ml (¾ cup + 2 tablespoons to 1 cup) lukewarm water
- 1 tablespoon (15ml) poppy seeds or sesame seeds (optional, for topping)
For the Egg Wash
- 1 large egg white (reserved from above)
- 1 tablespoon (15ml) cold water
Yield: 1 large braided loaf (approximately 900g) Serving Size: 1 slice (approximately 45g) Servings: 18-20 slices
Ingredient Notes & Substitutions
- Flour Selection: Strong bread flour (12-14% protein) provides the structure needed for the enriched dough. All-purpose flour can be used, but the texture will be slightly less chewy.
- Oil Choice: Traditional challah uses vegetable oil to keep it pareve (neutral in kosher laws). Olive oil can be used but will add a distinct flavor.
- Egg Temperature: Room temperature eggs incorporate more easily into the dough and help maintain proper dough temperature.
- Water Temperature: Lukewarm water (around 37°C/98°F) activates yeast without killing it. Too hot water will kill the yeast; too cold will slow activation.
- Sweetener Options: While this recipe uses sugar, honey can be substituted for a more traditional flavor (use 60g honey and reduce water by 1 tablespoon).
Cost Estimate: $3-4 for all ingredients, making each large loaf approximately $3-4.
Instructions/Steps
Activating the Yeast
-
Proof the yeast: In a small bowl, combine the yeast with a pinch of sugar and 2 tablespoons of lukewarm water. Stir gently and let sit for 10 minutes until foamy. This step ensures your yeast is active and ready to leaven the dough.
Pro Tip: If using active dry yeast, dissolve it in all the lukewarm water with a pinch of sugar and let sit for 5 minutes before proceeding.
Mixing the Dough
-
Combine dry ingredients: In a large mixing bowl, whisk together the flour, remaining sugar, and salt until well combined. This ensures even distribution of ingredients throughout the dough.
Pro Tip: Create a well in the center of the dry ingredients to contain the wet ingredients initially, making mixing easier.
-
Add wet ingredients: In a separate bowl, whisk together the 2 whole eggs, egg yolk, and oil until well combined. Pour this mixture into the well in the dry ingredients, along with the activated yeast mixture.
-
Mix initial dough: Using your hands or a dough scraper, gradually incorporate the dry ingredients into the wet ingredients, adding the remaining lukewarm water gradually. Mix until a shaggy dough forms. The dough should be moist but not overly sticky.
Kneading the Dough
-
Knead by hand: Turn the dough out onto a lightly floured surface. Knead for 10-15 minutes until the dough is smooth, elastic, and springs back when pressed. The dough should feel soft and supple but not sticky.
Pro Tip: Use the heel of your hand to push the dough away from you, then fold it back over itself. Rotate the dough a quarter turn and repeat. This develops the gluten structure necessary for a light, airy crumb.
-
First fermentation: Lightly oil a clean bowl, form the dough into a ball, and place it in the bowl. Turn the dough to coat it lightly with oil. Cover with plastic wrap or a damp kitchen towel and let rise in a warm, draft-free place for 1 hour, or until doubled in size.
Braiding the Challah
-
Divide the dough: Turn the risen dough out onto a clean work surface and gently deflate it. Divide the dough into three equal pieces (about 300g each) for a traditional three-strand braid.
Pro Tip: Use a kitchen scale for equal portions—this ensures even braiding and uniform baking.
-
Shape the strands: Roll each piece into a rope about 40cm (16 inches) long, tapering the ends slightly. The strands should be of uniform thickness to ensure even baking.
-
Braid the dough: Lay the three strands parallel to each other. Pinch them together at the top end. Begin braiding by taking the right strand and crossing it over the middle strand, then taking the left strand and crossing it over the new middle strand. Continue this pattern until you reach the end, then pinch the strands together and tuck them underneath.
Pro Tip: Keep the braid tight but don’t stretch the strands—this creates the beautiful, defined look of traditional challah.
Final Proofing and Baking
-
Second rise: Carefully transfer the braided loaf to a baking sheet lined with parchment paper. Cover loosely with plastic wrap or a damp kitchen towel and let rise for 40 minutes, or until puffy and noticeably larger.
Pro Tip: For a round challah (traditional for Rosh Hashanah), coil the braid into a circle, pinching the end to seal.
-
Preheat oven: About 20 minutes before baking, preheat your oven to 200°C (400°F).
-
Apply egg wash: In a small bowl, whisk together the reserved egg white and 1 tablespoon cold water. Gently brush this mixture over the entire surface of the challah, getting into all the crevices of the braid.
Pro Tip: The egg wash creates the beautiful golden shine. Be thorough but gentle to avoid deflating the dough.
-
Add seeds (optional): If using, sprinkle poppy seeds or sesame seeds evenly over the egg-washed surface.
-
Bake: Place the baking sheet in the preheated oven and bake for 25-30 minutes. After 15 minutes, check the color—if the top is browning too quickly, cover loosely with aluminum foil. The challah is done when it’s deep golden brown and sounds hollow when tapped on the bottom. An instant-read thermometer inserted into the center should read 88-93°C (190-200°F).
Pro Tip: For extra insurance, you can tent the challah with foil for the first 20 minutes, then remove it for the final 5-10 minutes to ensure deep golden color.
-
Cool completely: Remove the challah from the oven and let cool on a wire rack for at least 1 hour before slicing. This crucial step allows the crumb structure to set properly.
Recipe Info Box
|
Prep Time
|
30 minutes
|
|---|---|
| Cook Time | 25-30 minutes |
| Total Time | 2-3 hours (including rising time) |
| Servings | 1 large loaf (18-20 slices) |
| Difficulty Level | Intermediate |
| Course | Bread, Side Dish |
| Cuisine Style | Jewish, Traditional |
Nutrition Information
Per serving (1 slice, approximately 45g):
|
Nutrient
|
Amount
|
% Daily Value*
|
|---|---|---|
| Calories | 130 kcal | 7% |
| Protein | 4g | 8% |
| Carbohydrates | 22g | 8% |
| Fat | 4g | 6% |
| Fiber | 1g | 4% |
| Sugar | 4g | – |
| Sodium | 137mg | 6% |
| Cholesterol | 22mg | 7% |
| Thiamin | 0.2mg | 17% |
| Riboflavin | 0.1mg | 8% |
| Niacin | 1.2mg | 8% |
| Folate | 31mcg | 8% |
| Calcium | 22mg | 2% |
| Iron | 0.7mg | 4% |
Health Benefits:
- Rich in B vitamins from enriched flour and eggs, supporting energy metabolism
- High-quality protein from eggs and flour for muscle maintenance
- Moderate fat content from vegetable oil, providing essential fatty acids
- Versatile base that can be adapted for various nutritional needs
- Cultural significance that promotes mindful eating and community sharing
Disclaimer: Nutrition values are estimates based on USDA data and may vary depending on specific ingredients and portion sizes. These values should not be used for medical nutrition therapy.
Tips/Variations/Notes
Technique Improvements
- Temperature control: Ideal dough temperature during mixing is 24-26°C (75-80°F). If your kitchen is warm, reduce the water temperature slightly; if cool, use slightly warmer water.
- Gluten development: The windowpane test is crucial—stretch a small piece of dough between your fingers. It should be thin enough to see light through without tearing.
- Cold fermentation: For even better flavor development, after the first rise, refrigerate the dough for 24 hours, then proceed with shaping and final proof at room temperature.
- Braiding variations: Start with a simple three-strand braid before attempting more complex patterns like four-strand, six-strand, or round shapes for special occasions.
Flavor Variations
- Honey challah: Replace the sugar with 60g honey and reduce the water by 1 tablespoon. This creates a more traditional flavor and slightly moister crumb.
- Raisin challah: After the first rise, gently fold in 150g of raisins that have been soaked in warm water for 10 minutes and well-drained.
- Savory challah: Reduce sugar to 30g and add 1 tablespoon of dried herbs like rosemary or thyme. Perfect for serving with soups and stews.
- Whole wheat challah: Substitute up to 30% of the white flour with whole wheat flour. Increase water by 2-3 tablespoons as whole wheat absorbs more liquid.
Holiday Variations
- Rosh Hashanah round challah: Shape into a round coil to symbolize the cycle of the year. You can also add raisins for a sweet new year.
- Challah rolls: Divide the dough into smaller pieces and make individual rolls. Reduce baking time to 15-18 minutes.
- Challah buns: Shape into hamburger-sized buns for special sandwiches. Perfect for brisket or pulled chicken.
- Mini challah loaves: Divide the dough into smaller portions to make multiple small loaves—great for gifts or smaller households.
Storage and Serving
- Freshness preservation: Challah stays fresh for 2-3 days at room temperature. Store in a paper bag—plastic will make the crust soft.
- Freezing instructions: Challah freezes beautifully for up to 3 months. Wrap cooled loaves tightly in plastic wrap and aluminum foil. Thaw at room temperature.
- Serving suggestions: Excellent for French toast, bread pudding, or simply toasted with butter and jam. Also perfect for making croutons or breadcrumbs when stale.
Troubleshooting
- Dense, heavy challah: Usually caused by under-kneading or insufficient rising. Make sure to develop proper gluten structure and allow adequate proofing time.
- Pale crust: The oven may not have been hot enough, or the egg wash was applied too thinly. Use an oven thermometer to verify temperature.
- Dry crumb: Often the result of over-baking or too much flour. Check doneness with a thermometer and be conservative with additional flour during kneading.
- Uneven braiding: Ensure your dough strands are of equal length and thickness. Practice makes perfect—don’t be discouraged if your first attempts aren’t perfect.
Equipment Needed
Essential Tools
- Large mixing bowl (at least 4-quart capacity)
- Baking sheet with parchment paper
- Kitchen scale (for accurate measurements)
- Dough scraper (for handling dough)
- Pastry brush (for egg wash)
- Measuring spoons and cups
- Plastic wrap or damp kitchen towels
- Wire cooling racks
Nice-to-Have Extras
- Stand mixer with dough hook attachment (optional but helpful)
- Kitchen thermometer (for checking water and dough temperature)
- Bench scraper (for dividing dough)
- Instant-read thermometer (for checking doneness)
- Banneton or proofing basket (for final rise)
FAQs
Q: Can I make challah without a stand mixer? A: Absolutely! This recipe is designed to be made by hand. Hand kneading actually gives you better control over the dough development and helps you learn to recognize when the dough is properly kneaded.
Q: Why is my challah dense instead of light and fluffy? A: Dense challah is usually caused by under-kneading, insufficient rising time, or over-baking. Make sure to knead until the dough passes the windowpane test, allow adequate proofing time, and check for doneness with a thermometer.
Q: Can I use butter instead of oil in challah? A: While butter will work, traditional challah uses vegetable oil to keep it pareve (neutral in kosher laws). If you’re not following kosher dietary laws, butter will create a richer flavor similar to brioche.
Q: How do I know when the challah is fully baked? A: Look for a deep golden brown color, and the challah should sound hollow when tapped on the bottom. An instant-read thermometer inserted into the center should read 88-93°C (190-200°F).
Q: Can I make the dough ahead of time? A: Yes! After the first rise, you can refrigerate the dough for up to 24 hours. This actually improves the flavor. Let it come to room temperature before shaping and final proofing.
Q: What’s the significance of the braided shape? A: The three-strand braid is said to represent truth, peace, and justice. Round challahs made for Rosh Hashanah symbolize the cycle of the year and continuity.
Q: Can I freeze challah dough? A: It’s better to freeze the baked challah. If you must freeze dough, do so after the first rise. Thaw overnight in the refrigerator, then proceed with shaping and final proofing.
Q: Why do some challah recipes use honey while others use sugar? A: Both are traditional. Honey is often used for Rosh Hashanah to symbolize a sweet new year, while sugar is more common for regular Shabbat challah. Honey adds moisture and a distinct flavor.
Q: How long does homemade challah stay fresh? A: Properly stored at room temperature in a paper bag, challah stays fresh for 2-3 days. It also makes excellent French toast or bread pudding when slightly stale.
Q: Can I make this recipe gluten-free? A: Traditional challah relies heavily on gluten for its structure. While gluten-free versions exist, they require completely different ingredients and techniques and won’t produce the same result.
Recipe Story & Cultural Context
Challah represents one of the most iconic foods in Jewish culinary tradition, with roots stretching back thousands of years. The word “challah” comes from the Hebrew term “challah,” which refers to the portion of dough set aside as an offering to priests in ancient times, as commanded in the Torah. This practice, known as “hafrashat challah,” continues today, with many observant Jews setting aside a small piece of dough before baking.
The history of challah as we know it today began to take shape in the Middle Ages among Ashkenazi Jewish communities in Germany and Austria. Originally, challah was a simple, plain bread, but over time it evolved into the enriched, sweet bread we recognize today. The practice of braiding began in the 15th century, with different regions developing their own distinctive styles and patterns.
Challah holds deep symbolic meaning in Jewish tradition. The three-strand braid is said to represent truth, peace, and justice—three core values in Jewish teachings. For Rosh Hashanah, the Jewish New Year, challah is traditionally baked in a round shape to symbolize the cycle of the year and continuity of life. Some families add raisins to their Rosh Hashanah challah to symbolize a sweet new year.
The ingredients in challah also carry significance. The use of eggs makes challah rich and special, suitable for Shabbat and holidays when ordinary daily bread is not consumed. The sweetness symbolizes the joy and sanctity of these special occasions. Traditional challah is pareve (containing neither meat nor dairy), allowing it to be served with any type of meal according to kosher dietary laws.
Challah plays a central role in Jewish ritual life. On Friday evenings, two loaves of challah are placed on the Shabbat table, covered with a decorative cloth, and blessed before the meal begins. This practice commemorates the double portion of manna that fell in the desert before Shabbat in biblical times. The two loaves also represent the commandments to “remember” and “observe” Shabbat.
Different Jewish communities have developed their own variations of challah. Sephardic Jews often make a flatter, less sweet version, while Ashkenazi communities favor the braided, sweeter style we know today. In some communities, challah is known by different names such as kitke, berkhes, or koylatch.
Today, challah has transcended its religious origins to become a beloved bread enjoyed by people of all backgrounds. Its versatility makes it perfect for French toast, bread pudding, sandwiches, or simply enjoyed on its own. The act of baking challah continues to be a meaningful tradition in many Jewish households, connecting generations through the shared experience of preparing this special bread.
Pairing Suggestions
Traditional Jewish Pairings
- Shabbat dinner: Serve alongside chicken soup, gefilte fish, or brisket
- Holiday meals: Perfect for Rosh Hashanah, Passover, and other Jewish celebrations
- Breakfast: Excellent for French toast or simply toasted with butter and jam
- Dessert base: Use for bread pudding or make into challah kugel
Beverage Pairings
- Wine: A sweet kosher wine like Manischewitz for traditional pairing
- Coffee: Strong black coffee or espresso for breakfast
- Tea: Black tea with lemon for afternoon tea
- Non-alcoholic: Grape juice or apple cider for family-friendly options
Seasonal Adaptations
- Spring: Add lemon zest and poppy seeds for a fresh, bright flavor
- Summer: Incorporate dried fruits like apricots and cranberries
- Autumn: For Rosh Hashanah, make round challah with raisins and honey
- Winter: Add warming spices like cinnamon and cardamom
Special Occasion Ideas
- Bar/Bat Mitzvah: Make multiple small loaves as party favors
- Wedding celebrations: Create a large, elaborately braided centerpiece loaf
- Holiday gifts: Bake mini challah loaves to give to friends and family
- Family gatherings: Make a variety of shapes and sizes to accommodate different preferences
Conclusion
Mastering the art of challah making is more than just learning a recipe—it’s connecting with thousands of years of Jewish tradition and culture. This iconic braided bread represents the joy of Shabbat, the sweetness of holidays, and the warmth of family gatherings. The act of baking challah can be a meditative, spiritual practice that brings families together across generations.
What makes this challah recipe special is its foundation in traditional Jewish techniques while providing clear, accessible instructions for modern bakers. The careful balance of ingredients creates the perfect texture—light and tender yet substantial enough to stand up to being dipped in soup or used for French toast. The braiding technique, while requiring practice, results in the beautiful appearance that makes challah so distinctive.
Whether you’re baking challah for Shabbat, Rosh Hashanah, or simply want to experience the joy of making this special bread, this recipe will guide you through each step with cultural insights and professional tips. From activating the yeast to creating the perfect braid, every step is designed to ensure success while honoring tradition.
We’d love to hear about your challah baking adventures! Please leave a comment below sharing your experience, any variations you tried, or questions you might have. Don’t forget to rate the recipe and share photos of your beautiful creations on social media using the hashtags below.
Remember, challah making is as much about the journey as the destination. Each braid teaches you something new about dough development, patience, and tradition. Embrace the process, learn from each bake, and enjoy the incredible satisfaction of creating authentic challah in your own kitchen.
Happy baking, and may your home be filled with the warmth and tradition of freshly baked challah!