
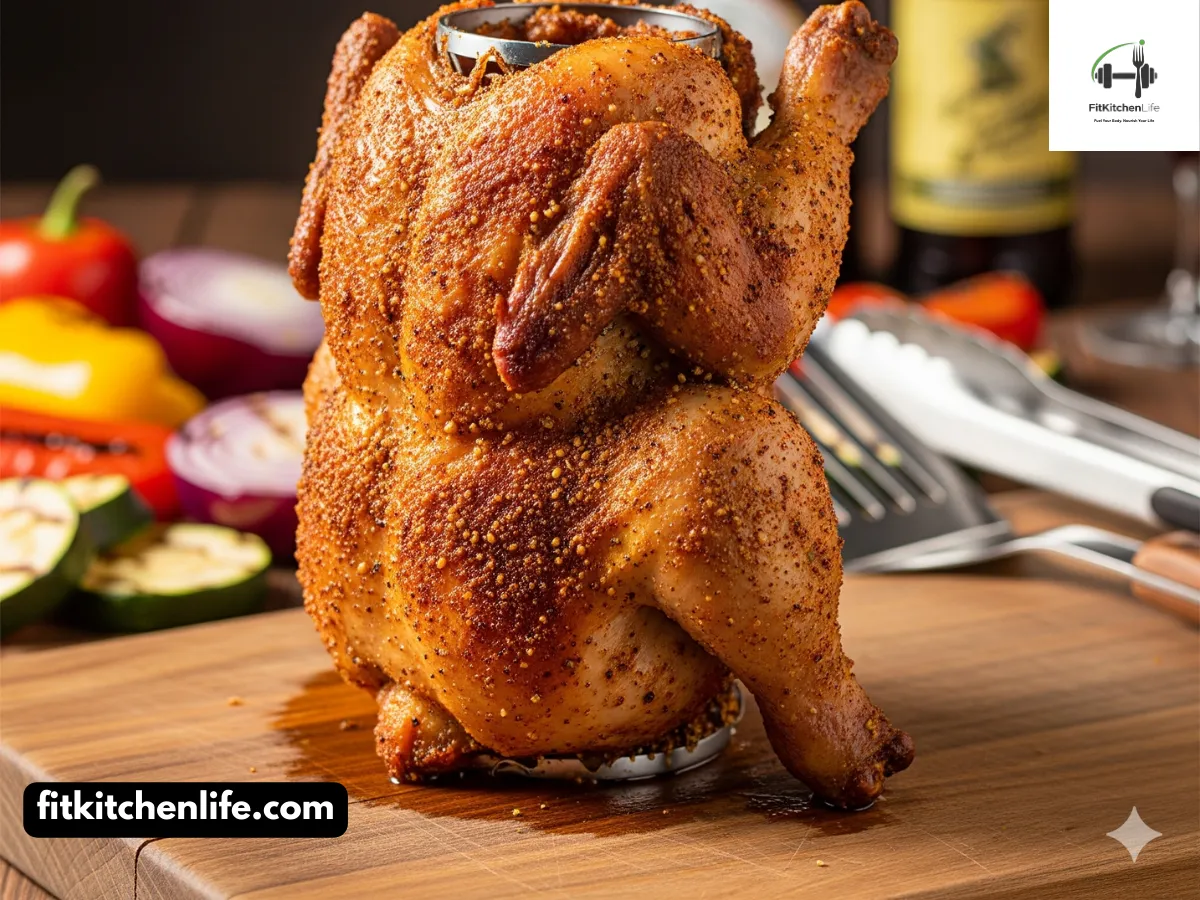
Picture this: a perfectly grilled chicken standing proudly upright on your barbecue, golden-brown skin glistening with spices, while the aroma of sizzling meat and malty beer fills the air. This is beer can chicken – the ultimate showstopper that combines culinary theater with incredible flavor and tenderness. It’s not just a cooking method; it’s an experience that guarantees moist, flavorful chicken every single time.
Beer can chicken emerged as a grilling phenomenon in the United States during the 1980s, though its exact origins remain somewhat mysterious. Some food historians trace it to Louisiana, while others claim it began in the American South. What’s certain is that this ingenious method solved one of grilling’s biggest challenges: keeping chicken moist while achieving crispy skin. By inserting a half-filled can of beer into the chicken’s cavity, the beer steams the meat from the inside while the outside roasts to perfection, creating the best of both worlds.
What makes this recipe special is the perfect balance of technique and flavor. We’ve combined traditional methods with modern insights to guarantee chicken that’s juicy on the inside and crispy on the outside, with a complex spice rub that complements rather than overpowers the natural chicken flavor. Whether you’re a seasoned grill master or a weekend barbecue enthusiast, this recipe will help you create beer can chicken that will have your friends and family talking long after the last bite.
Table of Contents
ToggleIngredients
For the Spice Rub
- 2 tablespoons (30g) smoked paprika
- 1 tablespoon (15g) brown sugar
- 1 tablespoon (15g) garlic powder
- 1 tablespoon (15g) onion powder
- 1 tablespoon (15g) kosher salt
- 2 teaspoons (10g) black pepper
- 2 teaspoons (10g) dried thyme
- 1 teaspoon (5g) cayenne pepper (adjust to taste)
- 1 teaspoon (5g) dried oregano
- 1 teaspoon (5g) mustard powder
For the Chicken
- 1 whole chicken (3.5-4 pounds/1.6-1.8kg)
- 2 tablespoons (30ml) olive oil or vegetable oil
- 1 (12-ounce/355ml) can of beer (lager or pilsner works best)
- Additional salt and pepper for seasoning
For the BBQ Setup
- Charcoal or gas grill
- Aluminum foil (for drip pan)
- Wood chips (optional, for extra smoke flavor)
- Beer can chicken holder (optional, but recommended)
Substitutions:
- Alcohol-free: Use soda water, ginger ale, or chicken broth instead of beer
- Different beer: Any beer works, but lighter beers let the chicken flavor shine through
- Spice adjustments: Reduce or eliminate cayenne for milder flavor; add smoked paprika for extra smokiness
- No grill: This method works in an oven at 350°F (175°C) for about 1 hour 20 minutes
- Vegetarian option: While this recipe is for chicken, you can use the same technique with a large portobello mushroom or cauliflower
Seasonal Note: Chicken is available year-round, but beer can chicken is especially popular during summer grilling season. Expect to pay $1-3 per pound for whole chicken, with prices typically stable throughout the year.
Instructions/Steps
Preparation (15 minutes)
-
Prepare the grill (10 minutes): If using a charcoal grill, light the coals and arrange them on one side of the grill, creating a two-zone fire. Place a drip pan on the cool side to catch drippings. For gas grills, preheat on high for 10 minutes, then turn off half the burners. Add wood chips to the coals if using, for extra smoke flavor.
-
Make the spice rub (5 minutes): In a small bowl, combine all the rub ingredients – smoked paprika, brown sugar, garlic powder, onion powder, kosher salt, black pepper, dried thyme, cayenne pepper, dried oregano, and mustard powder. Mix thoroughly until well combined. The rub should have a reddish-brown color with visible specks of different spices.
Preparing the Chicken (15 minutes)
-
Prepare the chicken (10 minutes): Remove the chicken from packaging and pat completely dry with paper towels. Remove any giblets from the cavity. Using kitchen shears, trim any excess fat or loose skin. Pat dry again – this step is crucial for crispy skin.
-
Season the chicken (5 minutes): Rub the chicken all over with olive oil, including under the skin where possible. Sprinkle the spice rub generously over the entire chicken, pressing gently to adhere. Season the cavity as well. Let the chicken sit at room temperature while you prepare the beer can.
Setting Up the Beer Can (5 minutes)
- Prepare the beer can (5 minutes): Open the beer can and pour out (or drink!) about half of the contents. Using a church key can opener, punch a few additional holes in the top of the can to allow more steam to escape. If desired, add a sprig of thyme or rosemary to the beer in the can for extra flavor.
Cooking the Chicken (1 hour 20 minutes – 1 hour 40 minutes)
-
Mount the chicken on the can (5 minutes): Carefully lower the chicken onto the beer can, inserting the can into the cavity. The chicken should stand upright on the can, with the legs forming a stable tripod. If using a beer can chicken holder, place the can in the holder first, then lower the chicken onto it.
-
Grill the chicken (1 hour 20 minutes – 1 hour 40 minutes): Place the chicken (still on the can) on the cool side of the grill, away from direct heat. Cover the grill and cook without disturbing for at least 1 hour. After 1 hour, check the temperature and rotate if needed for even cooking.
-
Check for doneness (5 minutes): Insert an instant-read meat thermometer into the thickest part of the thigh (without touching bone). The chicken is done when it reaches 165°F (74°C) in the thigh and 160°F (71°C) in the breast. If not done, continue cooking, checking every 10 minutes.
Resting and Serving (15 minutes)
-
Rest the chicken (10 minutes): Carefully remove the chicken from the grill using tongs and a spatula or large spoon for support. Transfer to a cutting board, keeping the chicken upright on the can. Let rest for 10 minutes – this allows the juices to redistribute throughout the meat.
-
Remove the can and carve (5 minutes): Using tongs and oven mitts, carefully remove the hot beer can from the chicken cavity. Carve the chicken and serve immediately.
Pro Tip: For extra crispy skin, increase the grill temperature to medium-high during the last 10 minutes of cooking, or finish the chicken under a hot broiler for 2-3 minutes after removing it from the grill.
Common Pitfall to Avoid: Don’t open the grill too frequently! Every time you lift the lid, you lose heat and extend the cooking time. Trust the process and only check the chicken after the first hour. Also, make sure your chicken is completely dry before seasoning – moisture is the enemy of crispy skin.
Recipe Info Box
|
Prep Time
|
20 minutes
|
|---|---|
|
Cook Time
|
1 hour 30 minutes
|
|
Total Time
|
1 hour 50 minutes
|
|
Servings
|
4-6
|
|
Difficulty Level
|
Medium
|
|
Course
|
Main Course
|
|
Cuisine Style
|
American BBQ
|
Nutrition Information
|
Nutrient
|
Per Serving
|
% Daily Value
|
|---|---|---|
|
Calories
|
485
|
24%
|
|
Protein
|
42g
|
84%
|
|
Carbohydrates
|
8g
|
3%
|
|
Fat
|
28g
|
36%
|
|
Saturated Fat
|
8g
|
40%
|
|
Fiber
|
1g
|
4%
|
|
Sugar
|
6g
|
24%
|
|
Sodium
|
890mg
|
39%
|
|
Cholesterol
|
135mg
|
45%
|
|
Vitamin B6
|
25%
|
|
|
Niacin
|
45%
|
|
|
Selenium
|
35%
|
Health Benefits: Chicken provides high-quality protein essential for muscle growth and repair. The cooking method helps retain moisture while allowing excess fat to drip away, making this a relatively healthy preparation. The spices offer various health benefits – paprika is rich in antioxidants, and garlic has antimicrobial properties.
Nutrition Disclaimer: Values are estimates and may vary based on ingredients, portion sizes, and preparation methods. For precise nutritional information, consult with a registered dietitian or use a certified nutrition calculator.
Tips/Variations/Notes
-
Crispy skin secret: Pat the chicken completely dry and let it air-dry in the refrigerator for a few hours before cooking. This helps achieve extra-crispy skin.
-
Beer alternatives: Try different liquids in the can – white wine, apple cider, or even root beer for different flavor profiles. For non-alcoholic versions, use chicken broth or soda water.
-
Wood chip variations: Add different wood chips to your coals for unique smoke flavors. Hickory and mesquite work well, while apple or cherry wood adds a sweeter smoke flavor.
-
Spice rub variations: Customize the rub to your taste. Add cumin and coriander for a Mexican twist, or rosemary and sage for Mediterranean flavors.
-
Oven method: If grilling isn’t an option, preheat your oven to 350°F (175°C). Place the chicken on a baking sheet and cook for about 1 hour 20 minutes, or until done.
-
Beer can chicken holder: Invest in a stainless steel beer can chicken holder. They’re more stable than using the can alone and eliminate concerns about heating the can’s lining.
-
Two-chicken method: If cooking for a crowd, you can cook two chickens at once. Just make sure your grill has enough space and the chickens aren’t touching each other.
-
Resting importance: Never skip the resting step! Letting the chicken rest for at least 10 minutes ensures juicy meat and allows the carryover cooking to finish.
-
Leftover ideas: Use leftover chicken in salads, sandwiches, tacos, or soups. The flavorful meat adds excitement to any dish.
-
Safety note: Be very careful when removing the hot beer can from the chicken. Use tongs and oven mitts, and consider having a second person help stabilize the chicken while you remove the can.
Equipment Needed
Essential Tools:
- Grill (charcoal or gas)
- Whole chicken (3.5-4 pounds)
- 12-ounce beer can
- Aluminum foil
- Meat thermometer
- Tongs
- Large cutting board
- Sharp knife
- Mixing bowls
- Measuring spoons
Nice-to-Have Extras:
- Beer can chicken holder
- Wood chips for smoking
- Church key can opener
- Kitchen shears
- Basting brush
- Grill thermometer
- Heat-resistant gloves
- Drip pan
- Serving platter
FAQs
Q: Is it safe to cook with a beer can? A: Yes, it’s generally safe as long as you’re using food-grade aluminum cans. However, some concerns exist about heating the can’s lining. For peace of mind, use a stainless steel beer can chicken holder instead of placing the can directly inside the chicken.
Q: Does the beer actually flavor the chicken? A: The beer primarily serves to create steam that keeps the chicken moist from the inside. While some beer flavor may infuse the meat, it’s quite subtle. The main flavor comes from your spice rub and the grilling process.
Q: Can I make this without alcohol? A: Absolutely! You can use soda water, chicken broth, apple cider, or even root beer instead of beer. The liquid’s main purpose is to create steam, so any liquid will work.
Q: How do I know when the chicken is done? A: Use a meat thermometer to check the internal temperature. The chicken is done when the thigh reaches 165°F (74°C) and the breast reaches 160°F (71°C). The juices should run clear when pierced.
Q: Why is my chicken skin not crispy? A: Several factors affect skin crispiness: make sure the chicken is completely dry before seasoning, don’t open the grill too often, and consider increasing the heat during the last few minutes of cooking.
Q: Can I use this method in the oven? A: Yes! Preheat your oven to 350°F (175°C), place the chicken on a baking sheet, and cook for about 1 hour 20 minutes, or until the internal temperature reaches the proper levels.
Q: What type of beer works best? A: Lighter beers like lagers or pilsners work well as they don’t overpower the chicken flavor. However, any beer will work, so feel free to experiment with your favorite brew.
Q: Do I need a special holder for the beer can? A: While not necessary, a beer can chicken holder provides more stability and eliminates concerns about heating the can’s lining. They’re inexpensive and worth the investment if you plan to make this often.
Q: Can I cook two chickens at once? A: Yes, as long as your grill has enough space. Make sure the chickens aren’t touching each other and that there’s good airflow around each one. Cooking time may need to be extended slightly.
Q: What sides go well with beer can chicken? A: Classic barbecue sides like coleslaw, potato salad, corn on the cob, and baked beans all pair wonderfully. For lighter options, try grilled vegetables or a simple green salad.
Recipe Story & Cultural Context
Beer can chicken stands as one of America’s most creative and entertaining grilling techniques, embodying the innovative spirit of American barbecue culture. While its exact origins remain somewhat mysterious, most food historians trace this cooking method to the 1980s, when it began appearing at barbecue competitions and backyard grills across the country.
Some sources suggest the technique originated in Louisiana, while others claim it began in the American South. What’s certain is that beer can chicken solved one of grilling’s perennial challenges: how to keep chicken moist while achieving crispy, flavorful skin. By inserting a half-filled can of beer into the chicken’s cavity, home cooks discovered that the beer would steam the meat from the inside while the outside roasted to perfection.
The method gained widespread popularity in the 1990s and early 2000s, becoming a staple at barbecue competitions and family gatherings. Its appeal lies not just in the delicious results, but in the theatrical presentation – a chicken standing upright on the grill, supported only by a beer can, never fails to capture attention and spark conversation.
Beer can chicken represents the perfect blend of simplicity and ingenuity that characterizes much of American barbecue culture. It requires no special equipment beyond what most grill owners already have, yet produces results that rival more complicated cooking methods. The technique also reflects the American tradition of improvisation – using everyday items (in this case, a beer can) in unexpected ways to achieve culinary excellence.
Over the years, beer can chicken has evolved from a novelty to a respected cooking technique, with professional chefs and home cooks alike putting their own spins on the basic concept. Some add wood chips for extra smoke flavor, others experiment with different liquids in the can, and many develop their own signature spice rubs.
Today, beer can chicken remains a beloved part of American grilling culture, representing the joy of outdoor cooking, the thrill of experimentation, and the satisfaction of feeding friends and family delicious, perfectly cooked food. It’s more than just a cooking method – it’s a celebration of creativity, community, and the simple pleasure of good food cooked over fire.
Pairing Suggestions
Beverage Pairings:
- Classic pairing: More of the same beer used in cooking creates a perfect flavor match
- Craft beers: IPA or pale ale complements the spices and adds hoppy notes
- Non-alcoholic: Iced tea, lemonade, or sparkling water with lemon provide refreshing contrast
- Cocktails: A light lager shandy or margarita enhances the barbecue experience
Side Dish Combinations:
- Classic barbecue: Coleslaw, potato salad, baked beans, and corn on the cob for the ultimate barbecue spread
- Grilled vegetables: Zucchini, bell peppers, onions, and asparagus grilled alongside the chicken
- Starches: Roasted potatoes, garlic bread, or cornbread to soak up the flavorful juices
- Fresh salads: Garden salad with vinaigrette or cucumber salad for a light contrast
Seasonal Adaptations:
- Summer: Serve with watermelon salad, grilled corn, and cold beer for the perfect summer meal
- Fall: Accompany with roasted root vegetables, apple cider, and hearty bread
- Winter: Pair with roasted winter squash, mashed potatoes, and red wine
- Spring: Serve with asparagus, new potatoes, and light white wine
Special Occasion Ideas:
- Fourth of July: The ultimate patriotic barbecue centerpiece
- Game day gatherings: Perfect for tailgating or watching sports with friends
- Birthday celebrations: Impressive yet easy to prepare for parties
- Casual dinner parties: Great for entertaining with minimal active cooking time
Conclusion
This ultimate BBQ beer can chicken recipe captures the perfect balance of showmanship and substance, delivering chicken that’s as impressive to look at as it is delicious to eat. From the clever technique that keeps the meat incredibly moist to the spice rub that creates a flavorful, crispy crust, every element has been designed to help you achieve beer can chicken perfection.
What makes this recipe special is its combination of reliability and wow factor. While the method might seem unusual at first, it’s actually quite straightforward and produces consistently excellent results. The standing chicken creates a dramatic presentation that’s sure to impress your guests, while the steam-from-within cooking method guarantees juicy, flavorful meat every time.
Remember that beer can chicken is more than just a recipe – it’s an experience that brings people together. The sight of the chicken standing proudly on the grill, the aroma of spices and smoke filling the air, and the anticipation of that first juicy bite – these are all part of what makes grilling special.
We’d love to hear how your beer can chicken turns out! Leave a comment below with your experience, rate the recipe, and share any creative variations you tried. Don’t forget to snap a photo of your impressive creation and post it on social media with the hashtag #UltimateBeerCanChicken – we can’t wait to see your grilling masterpieces!
If you enjoyed this recipe, be sure to share it with friends and family who love grilling. And remember, the best barbecue is made with passion, shared with enthusiasm, and enjoyed with good company and cold beverages on hand.
Happy grilling, and may your beer can chicken be the star of your next barbecue!
References
-
Wikipedia. (2023). Beer can chicken. Retrieved from https://en.wikipedia.org/wiki/Beer_can_chicken
-
Simply Recipes. (2023). Beer Can Chicken Recipe. Retrieved from https://www.simplyrecipes.com/recipes/beer_can_chicken
-
Food Network. (2023). Pat’s Beer Can Grilled Chicken Recipe. Retrieved from https://www.foodnetwork.com/recipes/patrick-and-gina-neely/pats-beer-can-grilled-chicken-recipe-1945080
- Allrecipes. (2023). Beer Can Chicken Recipe. Retrieved from https://www.allrecipes.com/recipe/214618/beer-can-chicken